
On my previous post I've played around with various tools on the Mapbox vector tiles ecosystem. On this post I'm taking it further: generating my own vector tiles.
There are various options to generate vector tiles:
- using a server that generates the vector tiles dynamically based on other data (such as PostGIS)
- programatically generating the protobuf (rolling your own code or using existing libs)
- using a tool that receives various inputs and outputs the corresponding vector tiles, which can then be used as shown on my previous post
Most options for these approaches are properly identified at this page: https://github.com/mapbox/awesome-vector-tiles
On this post I'm going to focus on this third option, particularly using a tool from Mapbox called Tippecanoe. I'm not an expert on any of these alternatives (I'm learning as I'm writing this post) but Tippecanoe seems incredibly robust, including a great deal of customisation options when generating the tiles.
It's simply a command-line tool that receives one or more GeoJson files as input and generates the corresponding vector tiles.
The readme is great so I'm not going to duplicate everything on this post. Basically installing is as simple as:
brew install tippecanoe
And running as
tippecanoe -o file.mbtiles [file.json ...]
Let me create a very basic map to see how this works.
- I've started by downloading a world shapefile from http://www.naturalearthdata.com/http//www.naturalearthdata.com/download/10m/cultural/ne_10m_admin_0_countries.zip (and extracting it obviously)
- To convert a Shapefile to Geojson the easiest way is probably to use ogr2ogr from GDAL with the following command:
ogr2ogr -f GeoJSON -t_srs crs:84 world.geojson ne_10m_admin_0_countries.shp
- Now running tippecanoe on it:
tippecanoe -o world.mbtiles -z6 world.geojson
The "z" param is used to specify the highest zoom level to which tiles are generated. The default of 14 would take a looong time to finish. For the sake of this demo I'm going to keep things small and fast. For reference each zoom level requires 4^(zoom level) tiles.
After the tiles are generated we end-up with a .mbtiles file. This is basically a SQLite database including all the generated tiles inside, making it quite convenient to store, transfer and use.
I can try these vector tiles immediately but, without a style, nothing would be displayed. Fortunately tileserver-gl also provides a "data" mode where it shows the various layers of a mbtiles set.
So, simply running it against my "world.mbtiles" output from the previous step:
tileserver-gl-light world.mbtiles
Opening http://localhost:8080/data/world will show our map with a single layer called "worldgeojson"

I'm ready to create my style:
Using an editor is obviously ideal (I'll get to that later) but we can easily create a really dumb style "by hand":
style.json
{
   "version": 8,
   "sources": {
      "myworldmap": {
         "type": "vector",
         "url": "mbtiles://{v3}"
      }
   },
   "layers": [
      {
         "id": "background",
         "type": "background",
         "paint": {
            "background-color": "rgb(200, 200, 255)"
         }
      },
      {
         "id": "countries",
         "type": "fill",
         "source": "myworldmap",
         "source-layer": "worldgeojson",
         "paint": {
            "fill-color": "rgb(200,100,50)"
         }
      }
   ]
}
This is basically:
- Creating a source for vector tiles (as in defining where to load the tiles from)
- Creating a style layer to paint the background with a blue color
- Creating a style layer that points to the "worldgeojson" layer from the vector data and filling it with a flat color
config.json
{
  "options": {
    "paths": {
      "root": ".",
      "styles": ".",
      "mbtiles": "."
    }
  },
  "styles": {
    "world": {
      "style": "style.json"
    }
  },
  "data": {
    "v3": {
      "mbtiles": "world.mbtiles"
    }
  }
}
Running tileserver-gl as:
tileserver-gl-light -c config.json world.mbtiles
Opening a page at: http://localhost:8080/styles/world/#0/0/0 will show our custom map with our custom style:

Creating the styles manually is not very practical. Fortunately there are various tools that might help with that:
- The best one if obviously www.mapbox.com/studio
It provides a rich UI where one can define colors, filters, fonts, etc in a very user friendly fashion.

It's particularly useful for maps created and hosted in Mapbox. Regardless, you can still edit the styles online and then download them to use with your local mbtiles, although requiring a little bit of editing on the output to point to the relevant sources.

- A simple alternative is https://github.com/erikandre/mapbox-gl-style-editor.
- The best alternative to Mapbox Studio is definitely http://maputnik.com/.
Using it is very simple. You can either go directly to http://maputnik.com/editor/ or clone the git repo from https://github.com/maputnik/editor and run it as:
npm install
npm start
By default the editor runs on port 8888. The first thing to do is to add a source for our generated tiles. If you still have tileserver-gl running from one of the previous steps you'll have a tilejson file automatically prepared at: http://localhost:8080/data/v3.json.
Go to "Source" on the top and create a new source as:

- Source ID: mysource
- Source Type: Vector (TileJSON URL)
- TileJSON URL: http://localhost:8080/data/v3.json
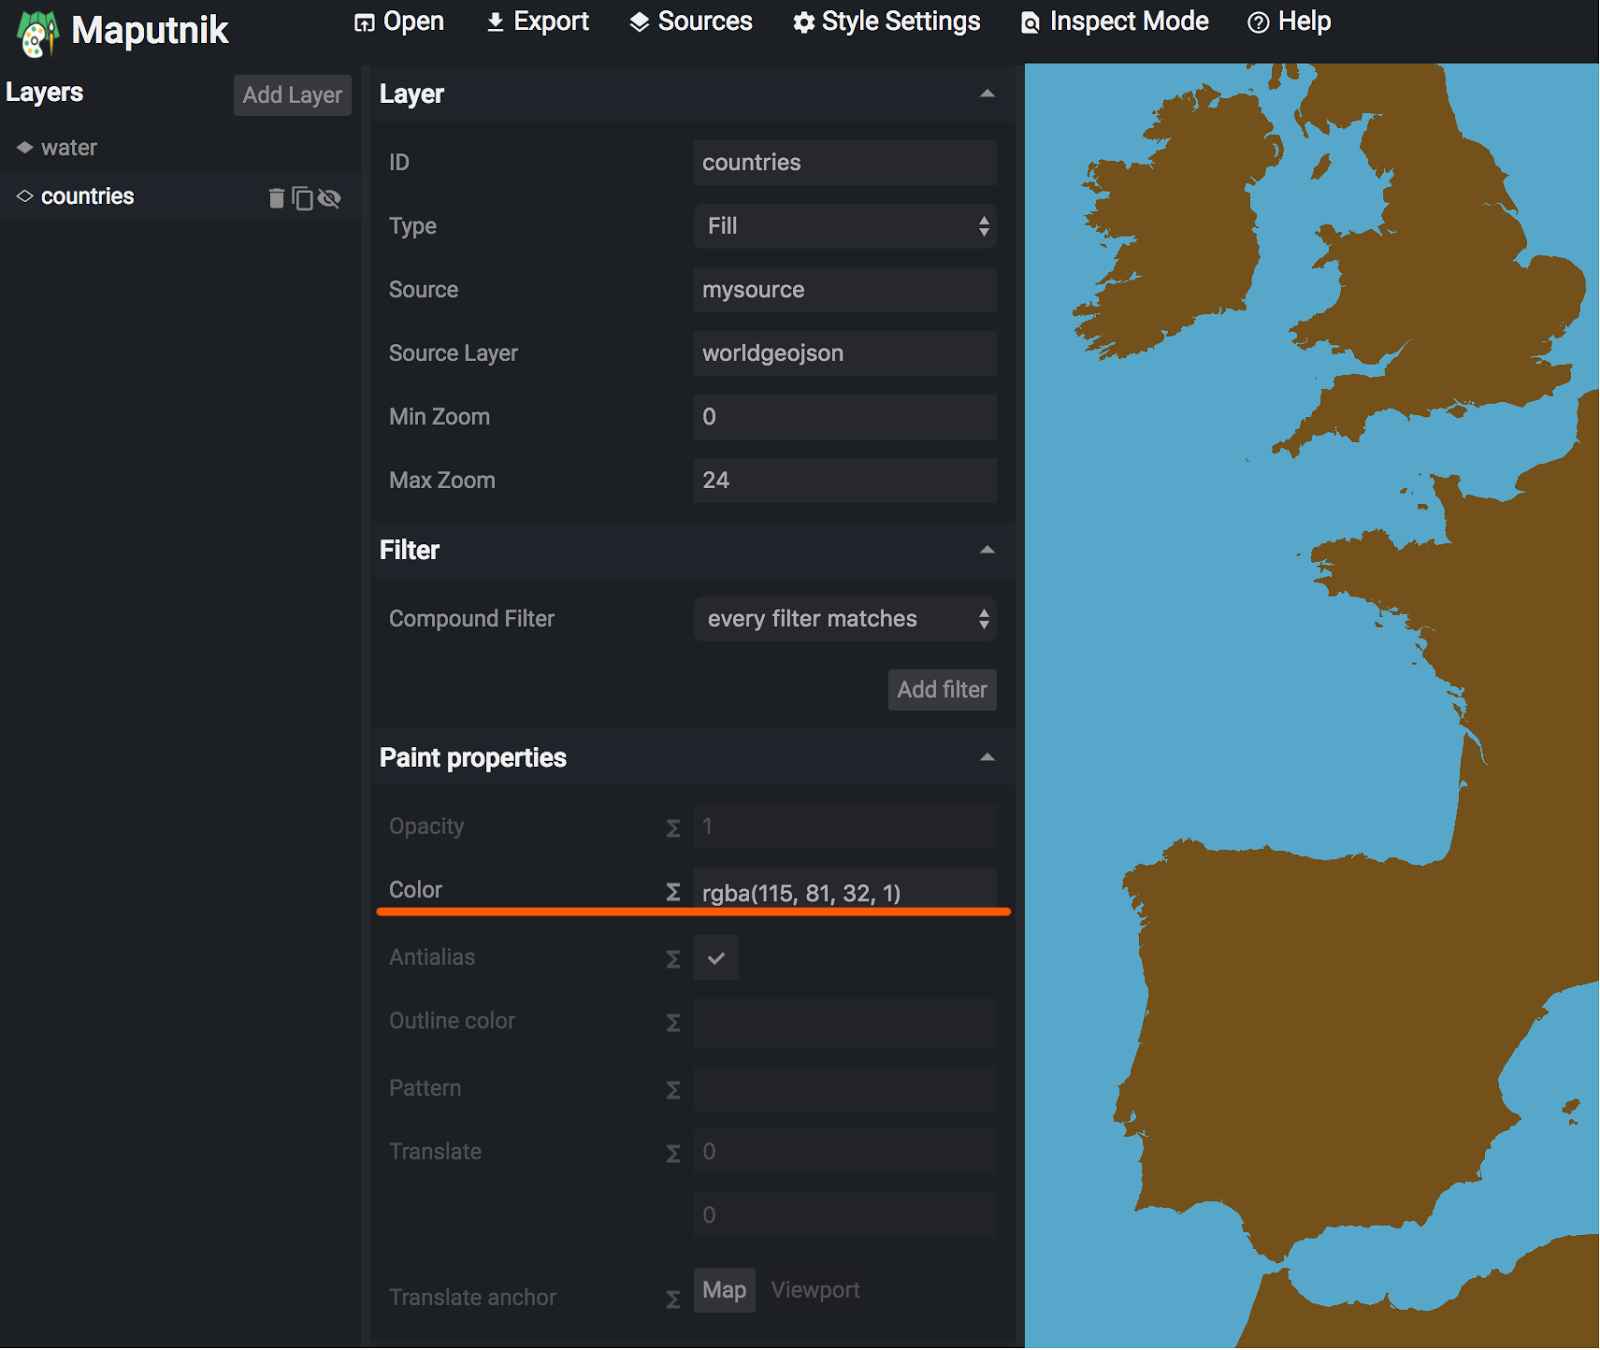
Afterwards we're ready to create a new layer that references data from this particular source. Press Add Layer on the left and add the layer data:

Also, create another layer for the background:

Now just choose a flat color for these layers. You'll end-up with something like this:
That's it for now. On my third and final post I'm going to build up on these techniques and do something more advanced/interesting.
Viva!
ReplyDeleteDescobri neste blogue vários artigos interessantes sobre estilização de mapas e servidor de "tiles".
Mas há um pormenor que nunca vi referido (ou não prestei a devida atenção).
Alguma vez tentou gerar os tiles no sistemas português de coordenadas EPSG:3763 ?
Já estou há alguns dias a investigar essa possibilidade (mesmo para sistemas de outros países) e não encontro nada.
Admito que estou focado só na stack da OpenStreetMaps (mod_tile + rednerd + mapnik).
Na stack que usa consegue gerar tiles em EPSG:3763 ?
Cumprimentos,
Eduardo
Olá Eduardo. Só reparei no seu comentário agora. Nunca experimentei utilizar o EPSG:3763, independentemente das várias stacks que já utilizei.
DeleteNice post!!
ReplyDeleteI wish you could make "tileserver-gl"-like that run on .net / windows IIS